Showing posts with label repaints. Show all posts

Saturday, July 9, 2011

ROTF Leader Class Optimus Prime

Update!

Yes. Another Optimus Prime repaint. But this one uses a technique which was taught by a very good friend of mine. It's a pretty nifty technique, and for me...another notch in my repainting skills. I'm still on the learning process and it gives me great pleasure and fun to be able to do what I do.

Anyhoo, this was one of the Primes that I was given to custom repaint for Big Cinema Sdn. Bhd. Last I heard, this guy has been packed and ready to be shipped to India to be one of their prizes for a contest there. Heh.

Okay...so here he is.

Leader Class Optimus Prime


So here's to hoping that the winner in India would really appreciate what I've done and take very good care of this Prime.

But...maybe I'll be seeing him on ebay pretty soon...LOL.

Cheers!

Wednesday, June 1, 2011

How it all started...

Hello all...sorry, but no updates yet...haven't had the time to shoot photos of my current projects...

But I do have a story to share with you all my dear avid followers...heh...

I was talking with my wife last night and she asked me, how did it all started...So I went back to when I was wee little boy, but she stopped me...and asked, "How did RK Designs began dear..."

Oh...

That story...heh...

And I think I haven't shared that little story...so here we are...now get yourself a warm blanket and a nice cup of chocolate drink...and let me tell you a tale of hard painting and tough sandings...

You see, I have been dabbling in Gundams for a very long time...but I actually started kitbashing way back in the 1980's...I was in primary school and my family wasn't that well off. So I had my fair share of toys that I played till it was...erm...unplayable...but I loved my toys no matter what and kept on playing and I modified them. Yep. That was my earliest kitbashing that I can remember...

In the later years, I sort of left what I was doing and started doing other things...scratchbuilding. Yeah, using cardboards and other art materials I was able to make my own Starmax Bomber, Starwolf and a command base. Cool huh? Yeah. I wish I had photos of them cause most of it was destroyed.

Now, fast forward to 2005. I had purchased some knock-off Transformer toys which was an Armada Optimus Prime and Starscream. The reason? I was just curious.

So I thought to myself, what can I do to make this guys better? Not having an airbrush means I'd have to handpaint. And those suckers are quite big and hand brushing wouldn't be smooth. So I went out and bought me a can...wait...make that a few cans of aerosol paints. So being new to this medium, I worked on the Prime. It was quite tedious since I didn't really know what I was doing...

Now they call it...Repainting.

And here's the Armada Optimus that I did in 2005..(it was never finished due to the fact that I started to work on other things...heh)


Ugly huh? With so called panel linings...LOL...

Then I got my airbrush set...and came this...


Masterpiece Starscream to Starscream G1 (TomyTakara) in 2007.

Then...


Masterpiece Starscream to Thundercracker (Hasbro) in 2008

And...


Masterpiece Skywarp to Sunstorm (Hasbro) in 2010...

Must be wondering why I posted images of the Masterpiece Seekers rather than the other works I've done...I guess the MP Starscream was the one repaint that started it all...way back in 2007.

Sigh...now that was a trip down memory lane eh? I guess the upcoming Transformers 3 movie sort of made me go all nostalgic when I started all of this...sometimes, we tend to forget the reason why we do the things we do...not fame, not glamour, not publicity, not acknowledgment and heck not even for money...

but simple honest to God passion.

And I know most customisers has their reasons of doing what they do, but they do it with passion and that is something that should be treasured and not forgotten.

It all started on that one day that I bought the knock-off Optimus Prime and the cans of aerosol paints in 2005.

And the rest is history...

Tuesday, March 8, 2011

Hasbro Star Wars Republic Gunship

Update!

Finally! I can post this guy up. Heh...this guy was done up for quite sometime and just recently the owner can pick it up (conflicting of time...) and due to my policy of not posting works that are done till the owner picks it up...yeah...it was awhile...

Okay, now here is the fella before the repaint...


So what was supposed to be done? Actually the owner wanted it weathered. Make it look less toyish but more to a military transport carrier. So I applied the usual weathering style for Star Wars vehicles but I stopped at using my 'space dust' technique. Why? Well for one thing, the gunships didn't do much battle in space. It was more of a ground infantry support/transport cruiser. So I decided not to apply that technique. I kept the weathering a little heavy on the nosecone, wings and undercarriage. The rest was light since it didn't face much wind resistance. It's fun how you utilize real life physics on models/toys (and common sense) to get the right look.

Here's the Republic Gunship. (yeah...I do everything...not just TRANSFORMERS and Gundams...LOL)


There you go, the Republic Gunship. Upcoming a few more Star Wars vehicles in waiting. So stay tuned. Oh before I forget, this gunship belongs to a local collector. Just wanted to put that in...heh...

Monday, February 28, 2011

MG Zeta Gundam 1.0 - Amuro version

Update.

Yup. I had an opportunity to work on a Master Grade Zeta Gundam version 1.0 (it's one of the earliest MG kits...). My good friend manage to get a good deal out of this and he has asked me to paint it with a very interesting color scheme. But there was something different about this guy...

It had 'blings'.


(photo courtesy of dalong.net)

Uh huh it was one of those special plated versions. And I for one, am a true hater of 'blings'. So getting a chance to un-'bling' this guy was a dream come true...hahahahaha...

So sanded most of the surface and primed it. Then applied the colors.

Here it is in all it's un-'bling' glory...LOL...


There you all go. My friend loved it so much and to be honest, so did I.

It's good to do Gunpla again. Don't you think so? ;)

Sunday, January 16, 2011

HALO Spartan II: Team Black - RK ver.

Update!

Just a little something to mix it up a bit.

I'm a big fan of the HALO games and when I knew the figures where out, I searched for the best Master Chief figure. A few weeks ago I managed to grab a new Master Chief figure from McFarlane toys, which I think is the best. So what am I gonna do with the other 2 figures of the legendary HALO hero?

Repaint them of course!!

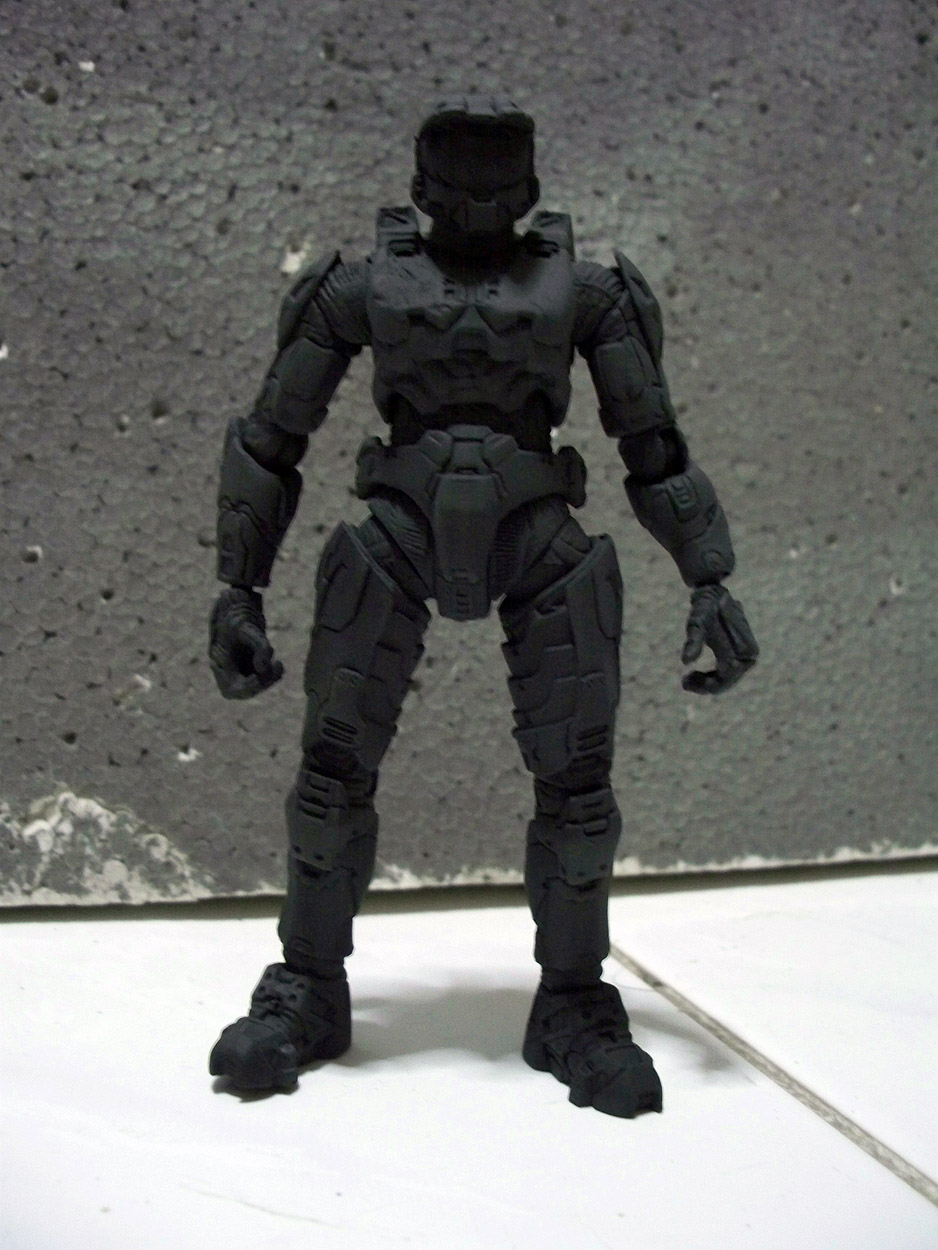
Well, it has been a plan of mine to do the Spartan II teams and the new team that I manage to read about was the Spartan: Team Black. A covert unit of Spartan II commandos. Their Mjolnir prototype armor were painted matte black. Since I had only two Chief figures, I opted to do Black One and Black Three, the leader and the heavy weapons specialist.

But I'm just gonna show one. The leader.

So here's how I worked on this small little project.

Here's the original figures.


I chose the slightly lanky figure to be the leader and the slightly stumpy to be the weapons specialist.


Masked the faceplate. Primed it with Mr. Hobby surface primer and painted it with flat black. Once the paints cured, I did my favourite technique...drybrushing! And the results...

Spartan II: Team Black - Black One


With the other Spartan II's. Master Chief, Spartan 104 Fred and Black One.


I'll post Black Three once I've found a suitable...erm...big gun to put him with. Heh.

Till next time!