Saturday, June 21, 2008

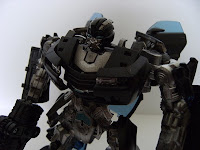
Alternator Jazz (G1 Styling Stripes)

Update!

Alright...I gotta be honest here, this is a project that I totally forgot that I did. Yeah. Totally left my mind about it. Guess the busy schedule and the amount of repaints that I'm doing for people sort of made me forget about this fella. The pictures were taken like ages ago...heh...

Okay, so what I did with this fella was a full body repaint and added the G1 stripes. Note that the stripes are painted on and are not decals whatsoever! I purposely didn't do the normal G1 markings since I look at it from a real person's point of view. If I were to own this car, I'd definitely just do the top stripes. The sides and are...erm...a bit too much. It's overkill.

So why the whole body paintjob? Simple, the plastic for this particular Alternator seems to be a bit off. I primed the whole body and gave it a new paintjob. Semi-gloss was just nice.

Here it is...the forgotten comission work...

Alternator Jazz with G1 Styling Stripes


Vehicle mode:


There you go. Another update...and I'm looking for anymore projects that I totally forgot...that is if there is...

:)

Cheers!

Thursday, June 19, 2008

TFTM Antimatter BumbleBee

Update!

Okay, another update. This here is another TFTM Bumblebee repaint. Color scheme that was used is my usual 'Nemesis' scheme. The owner (Jace, hope you love it man!) wanted an evil version of our beloved yellow camarro. So I opt for this scheme. Original plans was to do the trademark Nemesis blue green as its racing stripes, then come to think of it all of Hasbro's TFTM BB '08 has it and it become monotonous (no offence Hasbro...). A few months back I managed to watch the pilot episode of the new Knight Rider, so that gave me the idea for this fella...

Once completed, he had to have a name...not wanting to use the name 'Nemesis' (which I think is soooo overused...) I remembered reading comics from DC which had an 'Antimatter' universe, where all the good guys in our world were bad...so ta-daaa...

Antimatter Bumblebee


Vehicle Mode:


"I Feel Dark And Dirty...And Squashing That Human Bug Sam Witwicky..."


Alriteys...more updates coming soon peeps!

ps: I'm including the Alternator Army Project counter...just to show how many I've done and its like a countdown...hehehe..

Alternator Army: 15/34 completed

Fine Molds Y-Wing Fighter

Update!

Hey all...looks like today's update is a bit different from my usual works. Here we have a Fine Molds Y-Wing Fighter from everybody's favorite sci-fi trilogy Star Wars! Okay, so what's so awesome about this particular model kit? For one thing, the people from Fine Molds were given the models from the original Star Wars movie props by Lucasfilms themselves. So imagine the amount of details that was inside this kit.

Another cool thing about this kit is that the seamlines (where to parts join) are like close to nothing at all. Not that they didn't have any, just that it was ingeniously hidden between the panels! The pipings for the top and bottom fuselage were individually separated and had to be cemented properly. Anyhoo, enough ramblings...

Fine Molds Y-Wing Fighter


Close Ups:


Okay...I gotta be honest though, I did this kit like a few months back but totally forgot to post it here on RK Designs...so sorry about that...heh...

Until next time!

Friday, May 30, 2008

Articulated Victory Leo (WIP) Part01

Update!

(Not really a total update right now, its a Work In Progress post)

Been keeping this fella in storage for quite sometime. He was suppose to be paired with my other 'RK Articulated Version' Star Saber from the Transformer: Victory series. Was done a few months back when I had the modification bug hit me and it was in storage along with my Star Saber. After doing the WIP on the Robot Master BW Megatron, I took him out again to have a look and see what I can do (while waiting for parts, paint cure and etc...) to improve the basic work that I did.

Before I start, this particular Victory Leo was bought the same time with my Star Saber. Both are knock-off items. So thats why you can see that I did major modifications (it's a cheap price to pay...hah!).

Overall the original wasn't as high as Star Saber, so I had to make sure I don't overdo with the extensions, replacing parts are among the things that was done. I haven't worked out yet on the side railguns and also how to place his back cannons. This fella needs a lot more work to go into the painting stage, so we'll see how it goes...maybe I might do some more changes...

Victory Leo:


Close Ups:


With Star Saber:


Okay thats about it for Part 01 of the Victory Leo WIP. See you all soon.

Note: This is a Work In Progress (WIP) post. So the final work might not be the same as it was originally designed by RK Designs.

Wednesday, May 28, 2008

Robot Masters Megatron (WIP) Part 01

Update!

Okay, while I'm waiting for my parts to arrive (and paint curing as well) for most of my projects, I was working on the sidelines with this.

I manage to get my hands on one of those Robot Master Megatron that was issued a while back. It was kinda of a good deal from a pal of mine (Congrats on getting married dude!) and when I saw the RM Megs...well, let's just say that my stomach churned a bit...(sorry to the owners of this fig).

Looking at it along with the other two Megatron figs I had a brainstorm to upgrade the fella. Having an extra Gundam F91 (the ol' 90's kit) I decided to do a total makeover.

Currently its still a work in progress but I felt that I needed to share with you all what I've done at the moment.

Before: (image courtesy of seibertron.com)


Now: (still a work in progress)


Armed:


I hope to finish this guy around next week or so, keep on checking for updates ya.

Ps: the articulated Star Saber is coming around soon along with a bunch of other repaints and kitbash, so hang on to your Cybertronian balls my friends!

Ja ne'! (its 'Later' in japanese...i think...heh)

Note: This is a Work In Progress (WIP) post. So the final work might not be the same as it was originally designed by RK Designs.

Friday, May 23, 2008

Iron Monger Repaint (Ironman Movie Series)

Update!

Okay, my previous posting was on the Mark II. Now make way for the Iron Monger! Alrite, when I first got him...well...I was ecstatic about it, until I tried to pose him...yeah...

His right leg was joined to his hip to create the smashing gimmick (which I personally think is dumb...). Not only it limited his poseability, he can't do anything! So I took it upon myself to get rid of that gimmick and give him the right to pose!

Well, the solution is putting in ball joints. I had to cut the joints connecting it and replace it with new joints. It was pretty tedious and any mistakes can cause me a figure. With a little putty and a brand new ball joint courtesy of Kotobukiya aftermarket modelling parts, he came out good. A little detailing and a new paint job, he was done.

Before:


Now:


Close up:


Posed:


There you go. It was one helluva time kitbashing this fella and now I feel much better owning him.

Cheeriosos!